

‘Struck by the rotting sickness,’ says Millicent, one of Elden Ring’s characters. A lot of users are interested to know about Millicent Elden Ring. In the end, Millicent’s suffering will not be in vain because she can be helped and worked with on an extensive questline. With that being said, here’s how you can complete the Millicent questline in Elden Ring.
Millicent, a non-player character in Elden Ring, has a backstory of her own. In order to complete Millicent Questline in Elden Ring, you’ll have to overcome more than a couple of bosses, even though it’s not as difficult as the Ranni quest.
At Gowry’s Shack in Caelid, you can begin Millicent’s quest right away. Do not expect to finish this quickly, as it will require you to have progressed further in the game to be capable of moving on to the next step. As always, be aware of spoilers ahead in these types of guides. How to complete the Elden Ring Millicent quest if you’re ready to get started.

How to Complete the Millicent Questline in Elden Ring?
It’s difficult enough to locate the start of the Millicent questline in Elden Ring. It’s not her fault in the first place. Sorcerer Gowry (who lives in Gowry’s Shack) asks players to save a woman infected with Scarlet Rot.
Located just north of the Sellia Gateway and south of the town of Sorcery, Gowry’s Shack is accessible to players. A quest in the Swamp of Aeonia will have players searching for an Unalloyed Gold Needle.
The Unalloyed Gold Needle can be found as a reward for defeating Commander O’Neil in the Swamp. If you are having trouble, here’s our detailed guide to help you defeat Commander O’Neil.
Now, take the Unalloyed Gold Needle back to Gowry, and he’ll give you Sellia’s Secret and ask for some time to fix the needle after that.
Return to Gowry’s Shack and get the needle from a nearby Site of Grace. After that, proceed to Sellia and lower the magical barriers by lighting the braziers there. Now, below is our detailed guide.
Find Gowry and Speak with Him

Millicent’s storyline does not begin with her on Elden Ring, but rather with a series of events. You must locate and speak with Gowry in order to begin this quest.
Just south of Sellia, the town of sorcery in Caelid, is Gowry’s Shack. The Southern Aeonia Swamp Bank Site of Grace in the southwest is the easiest way to get here if you haven’t already explored the area. Visit Gowry in the wooden hut, and you’ll find out that he wants to heal someone, but first he needs you to locate an item.
In order to heal Millicent, you must locate an Unalloyed Gold Needle, which can be found beyond the city of Sellia. After that, he promises to reveal the secrets of Sellia in exchange for this favor.
How to Get the Unalloyed Gold Needle?

The nearby Aeonia Swamp boss Commander O’Neil will drop this item. To get to the boss arena in the event that he gives you a hard time, you’ll want to grab the nearby Site of Grace, which is located on the swamp’s eastern edge.
However, he summons assistance which can make the fight more frustrating, despite Commander O’Neil’s lack of strength. While riding Torrent, you can also engage in combat with him.
As a last resort, if you’re having trouble eliminating the boss, try engaging him and leading him back to the Inner Aeonia Site of Grace. You can kite him into the Scarlot Rot geysers here to quickly reduce his health to a manageable level.
Go back to Gowry’s Shack and hand over the Unalloyed Gold Needle once you have it. Gowry will return the needle to you if you fast travel away and back, or if you rest at a Site of Grace.
Repair the Unalloyed Gold Needle & Open the Path to the Church of the Plague
The Church of the Plague, located atop a cliff just east of Gowry’s Shack, is your next stop. Upon receiving the Unalloyed Gold Needle from Gowry, he revealed the secret of Sellia, which allows you to cross the river from this side.
Once the beacons in the village are lit, you can either run to the location from the Bestial Sanctum or use Torrent to get there. When you pick up your first Deathroot and speak to D at Roundtable Hold, you can enter the sanctum.
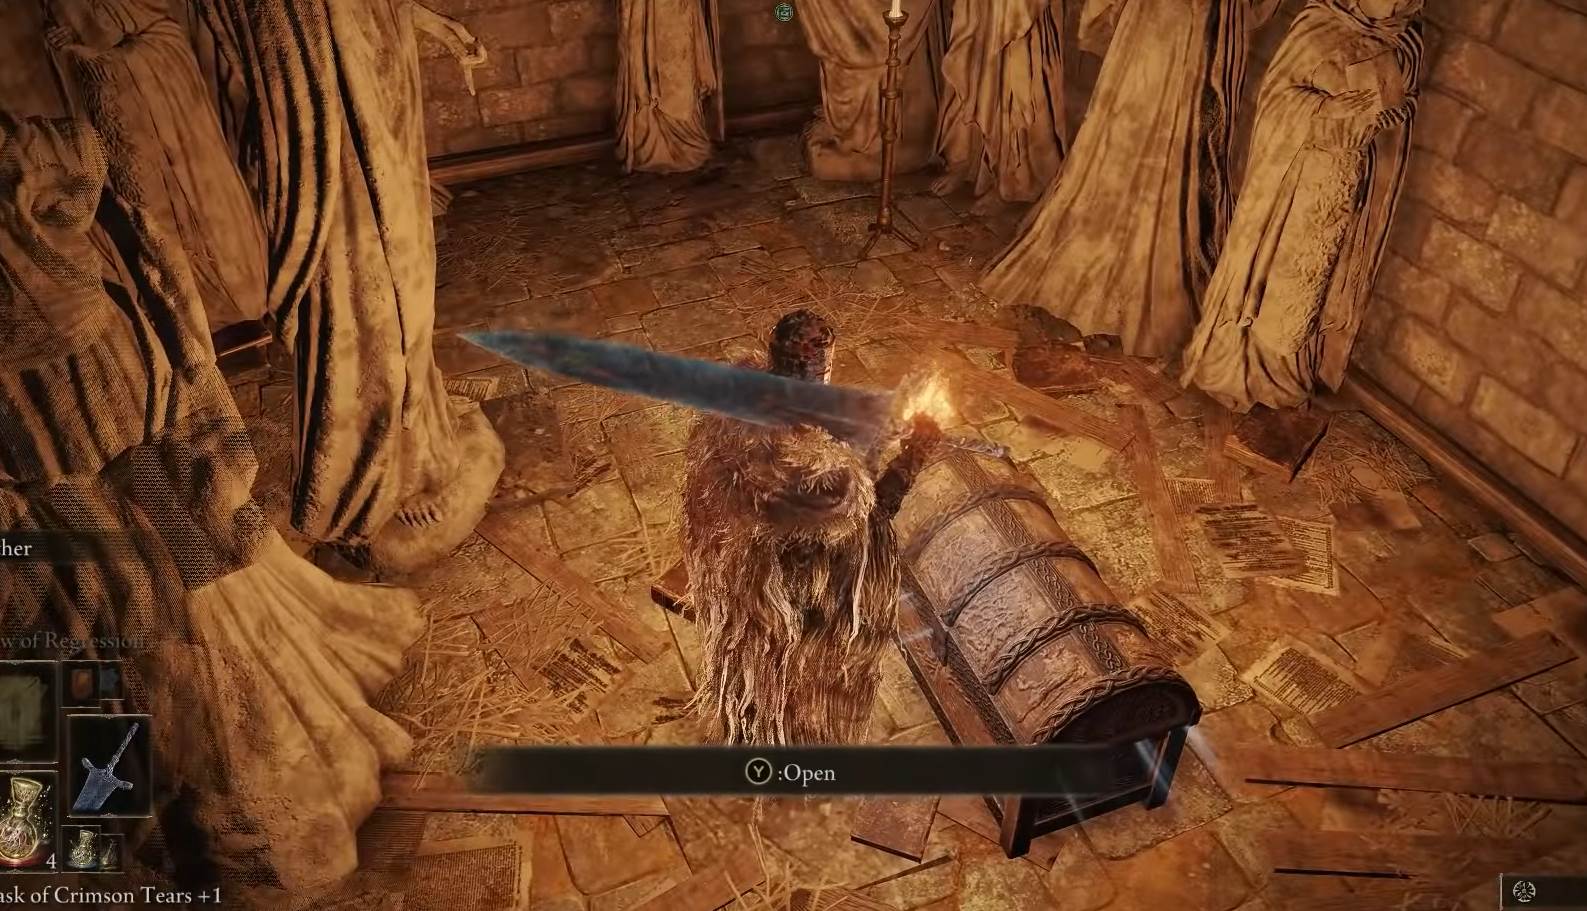
The ruins of a church are where you’ll find Millicent. Rest at the nearby Site of Grace after handing over the needle. Once she gives you the Prosthesis-Wearer Heirloom talisman, you can stop talking to her.
Gowry’s Shack is where you need to go now. Then return to Gowry’s shack by quickly traveling to the nearest Site of Grace. Millicent is now expected to arrive. Speak with her and use all of her available communication channels.
Get the Prosthesis-Wearer Heirloom Talisman, Talk to Gowry & Millicent

The Prosthesis-Wearer Heirloom is required to continue Millicent’s questline in Elden Ring. The Church of the Plague, located atop a cliff just east of Gowry’s Shack, is your next stop.
Upon receiving the Unalloyed Gold Needle from Gowry, he revealed the secret of Sellia, which allows you to cross the river from this side.
Once the beacons in the village are lit, you can either run to the location from the Bestial Sanctum or use Torrent to get there. When you pick up your first Deathroot and speak to D at Roundtable Hold, you can enter the sanctum.
The ruins of a church are where you’ll find Millicent. Rest at the nearby Site of Grace after handing over the needle. Once she gives you the Prosthesis-Wearer Heirloom talisman, you can stop talking to her.
Gowry’s Shack is where you need to go now. Then return to Gowry’s shack by quickly traveling to the nearest Site of Grace. Millicent is now expected to arrive. Speak with her and use all of her available communication channels.
Get the Valkyrie’s Prosthesis & Deliver It to Millicent
At the end of this section, the quest travels from Caelid to the Altus Plateau. There is no Millicent until you reach Atlus Plateau, which is located northeast of Liurnia, just past the Grand Lift of Dectus.
In the Shaded Castle area, just north of the Erdtree Gazing Hill Site of Grace, you can find the Valkyrie’s Prosthesis, which will allow you to continue her quest.
To get to the room where it resides, you’ll need to fight or run past a Cleanrot Knight.
Return to Millicent with the item once you’ve obtained it. Keep talking to her until you run out of new topics to talk about.
Defeat The Godskin Apostle & Follow Millicent Elden Ring
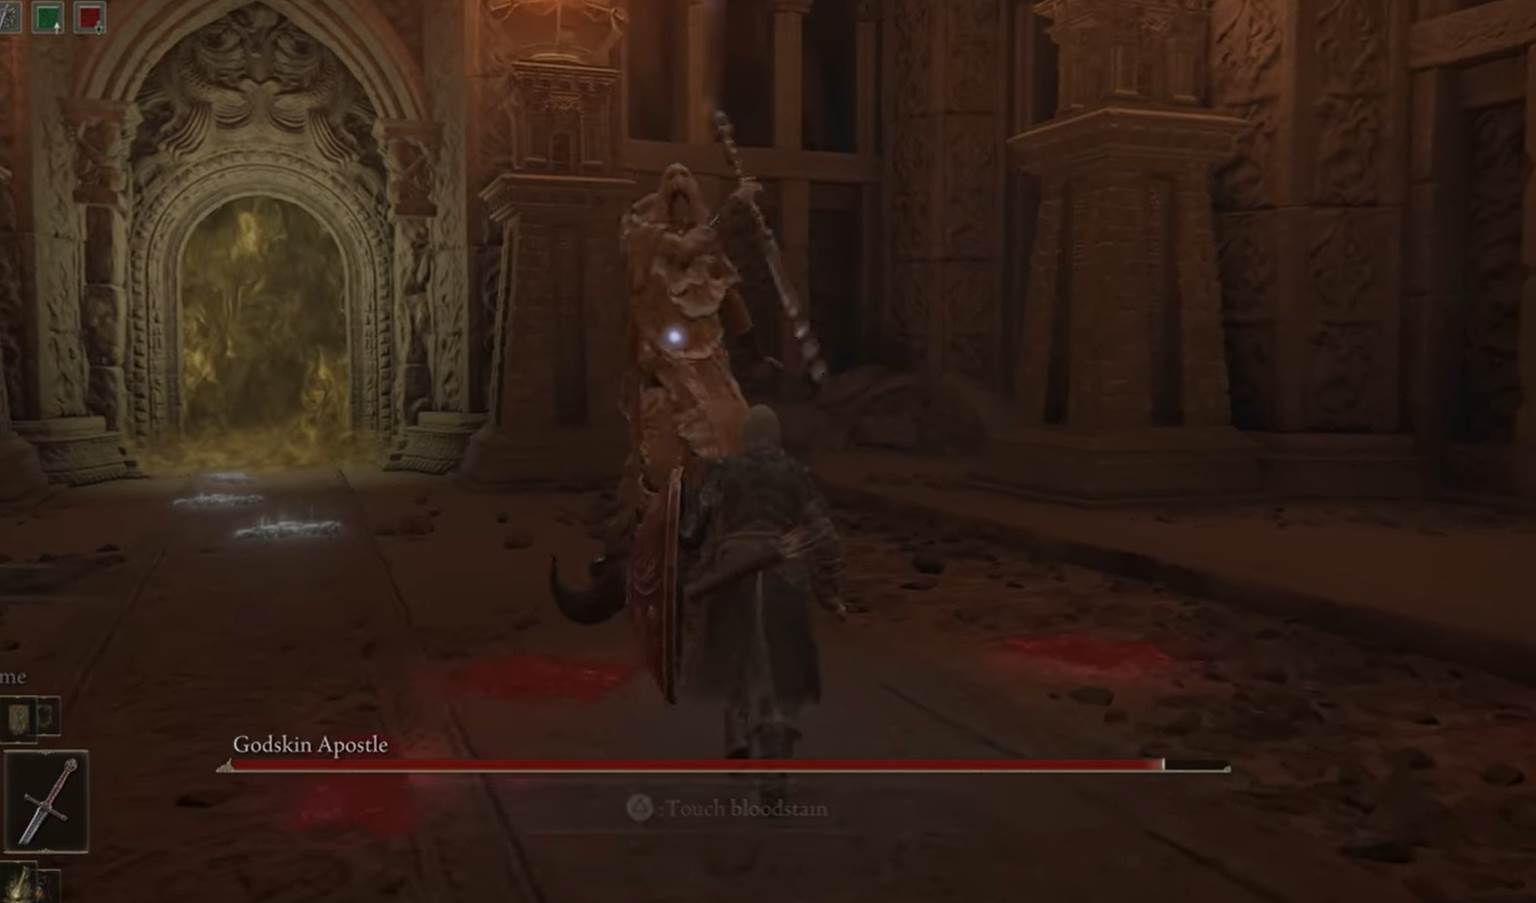
Windmill Village, located north of Atlus Plateau, is the next stop on your journey. Godskin Apostle is located at the top of a windmill in the narrow area of land to the east of Windmill Village Site of Grace.
You’ll have to dodge a lot of bullets from this boss. When he takes multiple hits of magic damage, he appears to lose his composure. Play it safe and be ready to dodge until you’ve figured out his attack patterns and the signs for his more devastating attacks, as with most bosses.
Activate the Windmill Heights Site of Grace after you’ve defeated the final boss in the game’s story. Millicent will be waiting for you here if you take a break or fly back and forth between the two locations. Let her ramble on for a while longer.
Defeat Ulcerated Tree Spirit
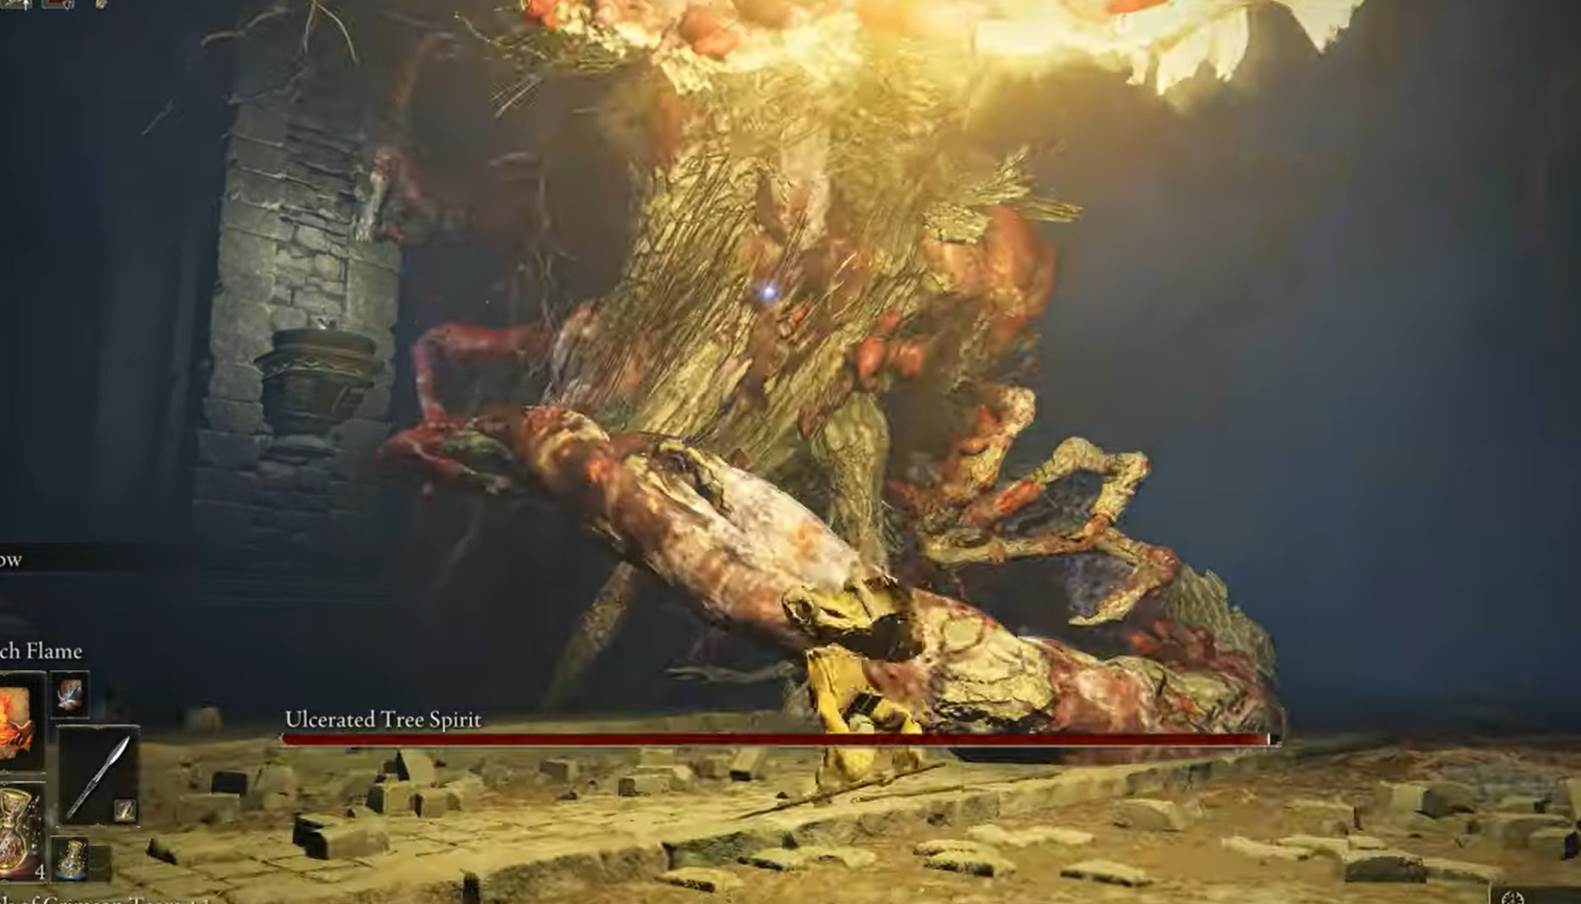
Make your way through the Haligtree to the Prayer Room Site of Grace once you’ve gained access to it. This is the final area of the game, so be prepared to face some tough opponents and defeat at least one boss in order to access it.
Talk to Millicent about Malenia and she’ll tell you all about her. Take a rest at a Site of Grace after fighting an Ulcerated Tree Spirit mini-boss. There are two summon signs in the boss area, and you’ll have to make a decision, just as you did with the Sellen quest option.
To assist Millicent in her battle against the NPC invaders, look for the yellow summon sign. To challenge Millicent, choose the red summon sign.
The Ending of Millicent’s Questline and Rewards
If you complete this quest, you’ll receive two different rewards. Follow these steps to decide on an ending for Millicent’s quest in Elden Ring:
At this location, rest after defeating the Ulcerated Tree Spirit miniboss. It is possible to select a different ending for Millicent’s quest in Elden Ring by using the summon signs found in the arena where you defeated this mini-boss.
Red Summon Sign: Challenge Millicent
Millicent appears in this ending and you defeat her. You will get a Rune Arch, 7261 Runes, and Millicent’s Prosthesis. Retrace your steps and return to Gowry’s Shack to find him dead.
Gold Summon Sign Assist Millicent Elden Ring
The boss Millicent’s sisters, four difficult NPCs, are defecated in this ending. Your attack power will be greatly increased after defeating them with the Rotten Winged Sword Insignia Talisman, which you’ll receive after defeating them.
The Unalloyed Gold Needle can be found in Millicent’s remains, which you can fast travel back to after she has finished speaking with you. Go back to Gowry’s Shack and finish Gowry’s dialogue there as well.
It is possible to exchange the Unalloyed Gold Needle for Miquella’s Needle following the defeat of Malenia, the Haligtree area boss. This needle can be used to change the ending in a specific manner.
The Flock’s Canvas Talisman and Gowry’s Bell Bearing in Elden Ring can now be obtained by returning to Gowry’s Shack, regardless of whether a player challenged or assisted Millicent.
To be clear, fans who challenged Millicent will find these items on the ground in the shack; however, those who assisted her must first kill Gowry in order to obtain them.
The Bottom Line
Well, that’s all we have here about how you can complete the Millicent Questline in Elden Ring. We hope this guide helped you. Also, check out our guide on Elden Ring’s Church of Inhibition. Along with that, there are some of the best Elden Ring Mods waiting to be played with and none can forget the Elden Ring Patches questline. Don’t forget to check out our other explainers, best lists, and how-to guides. Furthermore, if you have any questions or suggestions, please use the comment section below to contact us.