
Deployment Image Servicing and Management (DISM) in Windows 11 is a command-line tool that allows administrators to prepare, modify, and repair system images such as Windows Recovery Environment, Windows Setup, and Windows PE (WinPE). However, anyone with a local recovery image can use the tool to fix common system issues.
Further, you can use the System File Checker command-tool to scan and replace missing or corrupted system files using the recovery image when you need to troubleshoot a specific error, determine why the device stops booting correctly, or resolve performance issues.
The SFC command will not work if one or more Windows 11 files in the image are corrupted. If this is the case, you can repair the image with DISM and then use the SFC tool to repair the setup without having to reinstall Windows from scratch.
We’ll show you how to use the DISM and SFC tools with Command Prompt to restore a computer’s health without having to reinstall Windows 11 in this Windows 11 guide.

Warning: Although the commands in this guide are non dangerous, we still recommend that you create a full backup before proceeding because you will be making system modifications.
What is DISM in Windows 11?
In Windows, DISM or Deployment Image Servicing and Management is a handy command-line tool that comes preinstalled and is available in Windows 11.
All images used in Windows Setup, PE, and Recovery Environment (WRE) can be repaired using DISM (WinRE). When other Windows repair tools like System file check fail to fix a variety of problems in Windows 11, this program can.
For example, if your Windows 11 PC isn’t working properly due to a variety of unexplained issues, such as hardware failures, corrupt apps or software, or some combination thereof. All you need to do is run a few commands from the Command Prompt with the tool to fix these issues.
How to Use DISM to Repair Image of Windows 11
“CheckHealth,” “ScanHealth,” and “RestoreHealth” are the three options for repairing an image in the DISM command tool for Windows 11, which you should run in that order.
However, you can also use the “RestoreHealth” option to fix the locally available image using different source files, depending on the severity of the issue.
DISM Command Using CheckHealth Option
The CheckHealth option in the Deployment Image Servicing and Management command tool lets you quickly see if the local Windows 11 image has any corruption. This option, however, does not perform any repairs.
Follow these simple steps to check the Windows 11 image for issues regarding DISM:
- Click on the Start button
- Right-click the top result in the search for Command Prompt and choose Run as administrator.
- To perform a quick check, type the following command and press Enter:
DISM /Online /Cleanup-Image /CheckHealth
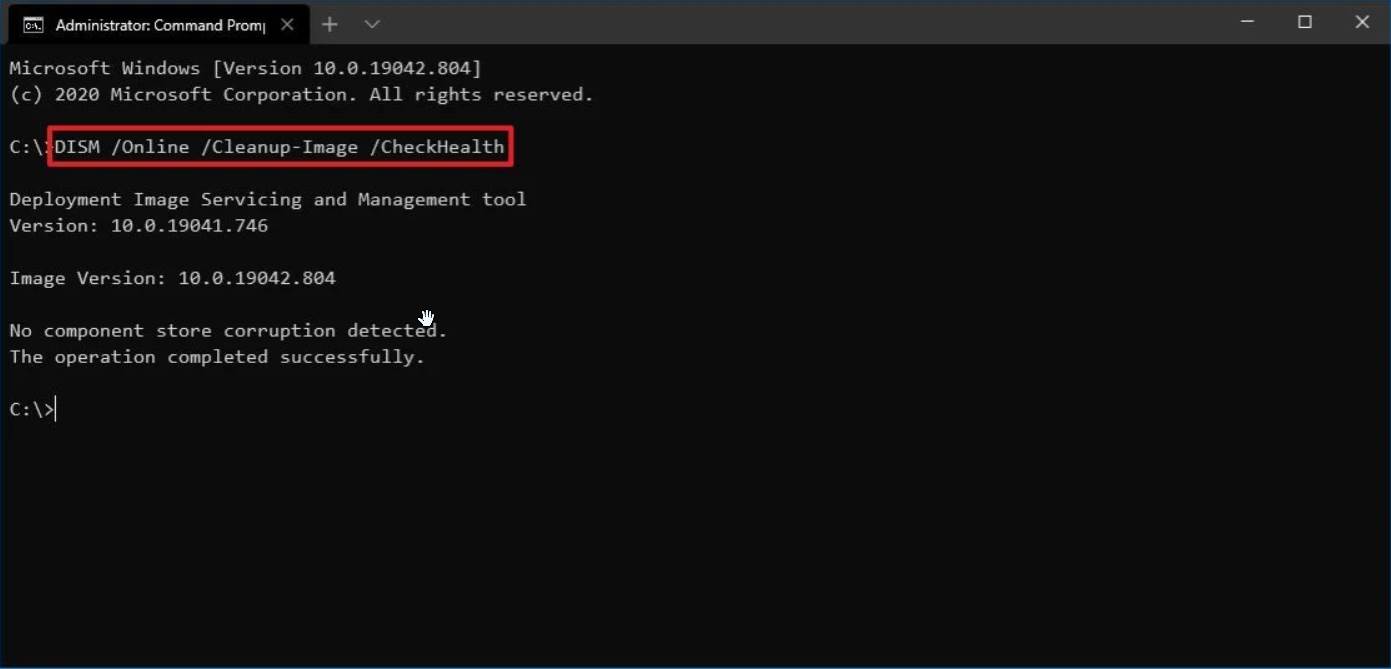
After you’ve finished the steps, DISM will run and check for any data corruption that needs to be fixed.
DISM Command Using ScanHealth Option
The ScanHealth option runs a more comprehensive scan to check whether Windows 11 image has any issues.
Follow these simple steps to check problems using the ScanHealth option:
- Click on the Start button
- Right-click the top result in the search for Command Prompt and choose Run as administrator.
- To perform an advanced DISM chan, type the following command and press Enter:
DISM /Online /Cleanup-Image /ScanHealth

Once you have completed the steps, the advanced scan could take several minutes to check and conclude whether the Windows 11 image needs to be repaired or not.
DISM command Using RestoreHealth Option
If the system image is corrupted, you can use DISM with the RestoreHealth option to automatically scan and repair simple issues.
Follow these simple steps to repair Windows 11 image problems with the RestoreHealth command:
- Click on the Start button
- Right-click the top result in the search for Command Prompt and choose Run as administrator.
- To perform an advanced DISM scan, type the following command and press Enter:
DISM /Online /Cleanup-Image /RestoreHealth
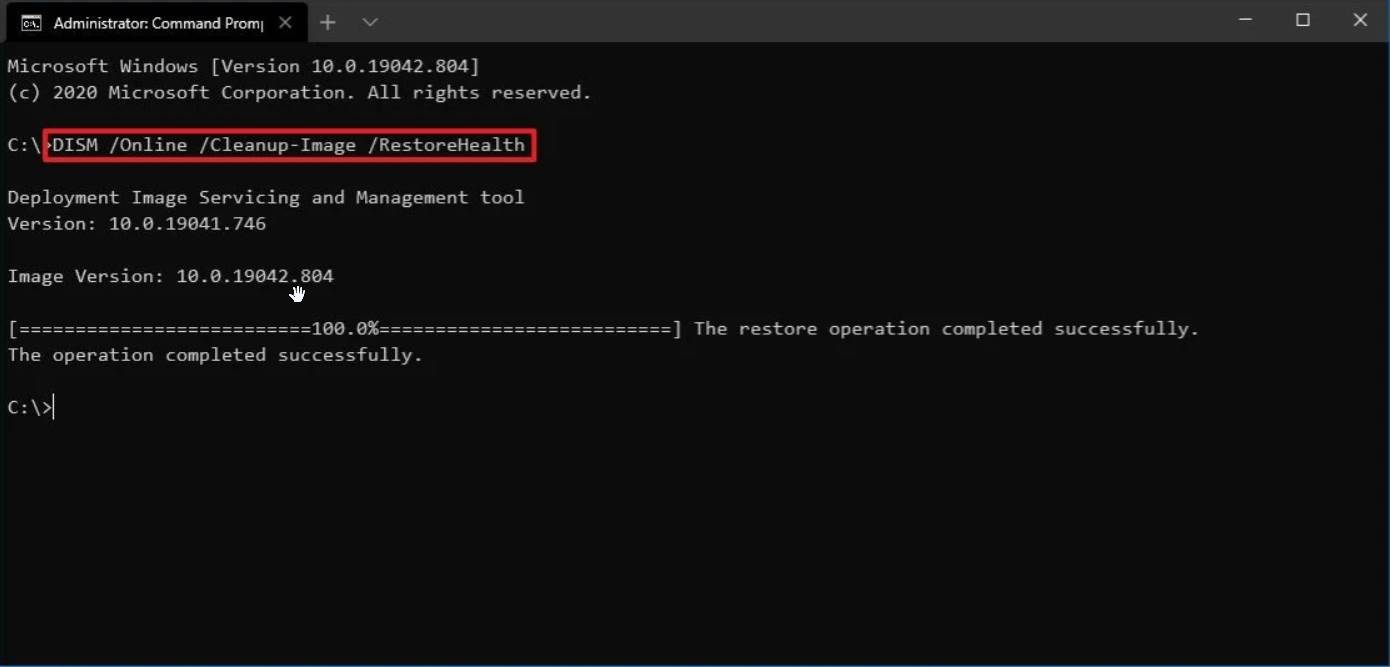
After you have completed the above steps, the Deployment Image Servicing and Management tool will connect to Windows Update online (if applicable) to download and replace damaged files.
Fix Problems with DISM Using install.wim Image
The DISM command usually works without a hitch, but if the damaged files cannot be replaced or you don’t have access to the internet, you’ll need to provide another image using the Source option to finish the job.
An “install.wim” or “install.esd” file from another computer, bootable install media, or a Windows 11 ISO file are usually the best options.
However, you must ensure that the files are compatible with the version, edition, and language of the Windows 11 version you’re trying to repair.
Download the Windows 11 ISO File
If you need to use a different source for the files, you should download a fresh copy of Windows 11 using the Media Creation Tool.
Again, follow these steps to download the Windows 11 ISO file:
- Go to the official Microsoft Website.
- Select “Download Tool Now” from the drop-down menu.
- Now, to run the setup, double-click the MediaCreationToolxxxx.exe file
- After that, to accept the terms, click the Accept button
- Choose the Create installation media option (DVD, ISO file, or USB flash drive) for a different PC.

- Click the Next button.
- Click on the Next button again.

- Choose the ISO File option.

- Again click on the Next button.
- Select the destination where you want to store the Windows 11 ISO file.
- Next click on the Save button.
- After that, click on the link to open the file location using File Explorer.

- Click on the Finish button.
- Now double-click on the Windows ISO file to mount the image.
- Finally, under the “This PC” section, verify the drive letter for the mount in the left panel.

After you’ve completed the steps, you can use the DISM tool to repair the local image of Windows 11 using the “Source” option.
Fix Windows 11 Recovery Image
Follow these steps to run the Deployment Image Servicing and Management tool with an alternate source (install.wim) image.
- Click on the Start button
- Right-click the top result in the search for Command Prompt and choose Run as administrator.
- Copy this command directly onto the command prompt and press Enter to repair the Windows 11 image.
DISM /Online /Cleanup-Image /RestoreHealth /Source:E:\Sources\install.wim
Replace the Source drive letter with respect to the ISO mount point in File Explorer.

- (Optional) To limit the use of Windows Update, enter this command:
DISM /Online /Cleanup-Image /RestoreHealth /Source:E\Sources\install.wim /LimitAccess
The command will scan and repair the most common problems using the “install.wim” file you specified as an alternative source once you’ve completed the steps.
The Bottom Line
Well, that’s all we have for you regarding using the DISM Command tool to Repair Windows 11 Image. We hope you found this guide helpful and now you can solve all your Windows PC errors easily, provided you have a fast internet connection. If you liked this, don’t forget to check out our other explainers, best lists, and how-to guides. Furthermore, if you have any questions or suggestions, please use the comment section below to contact us.